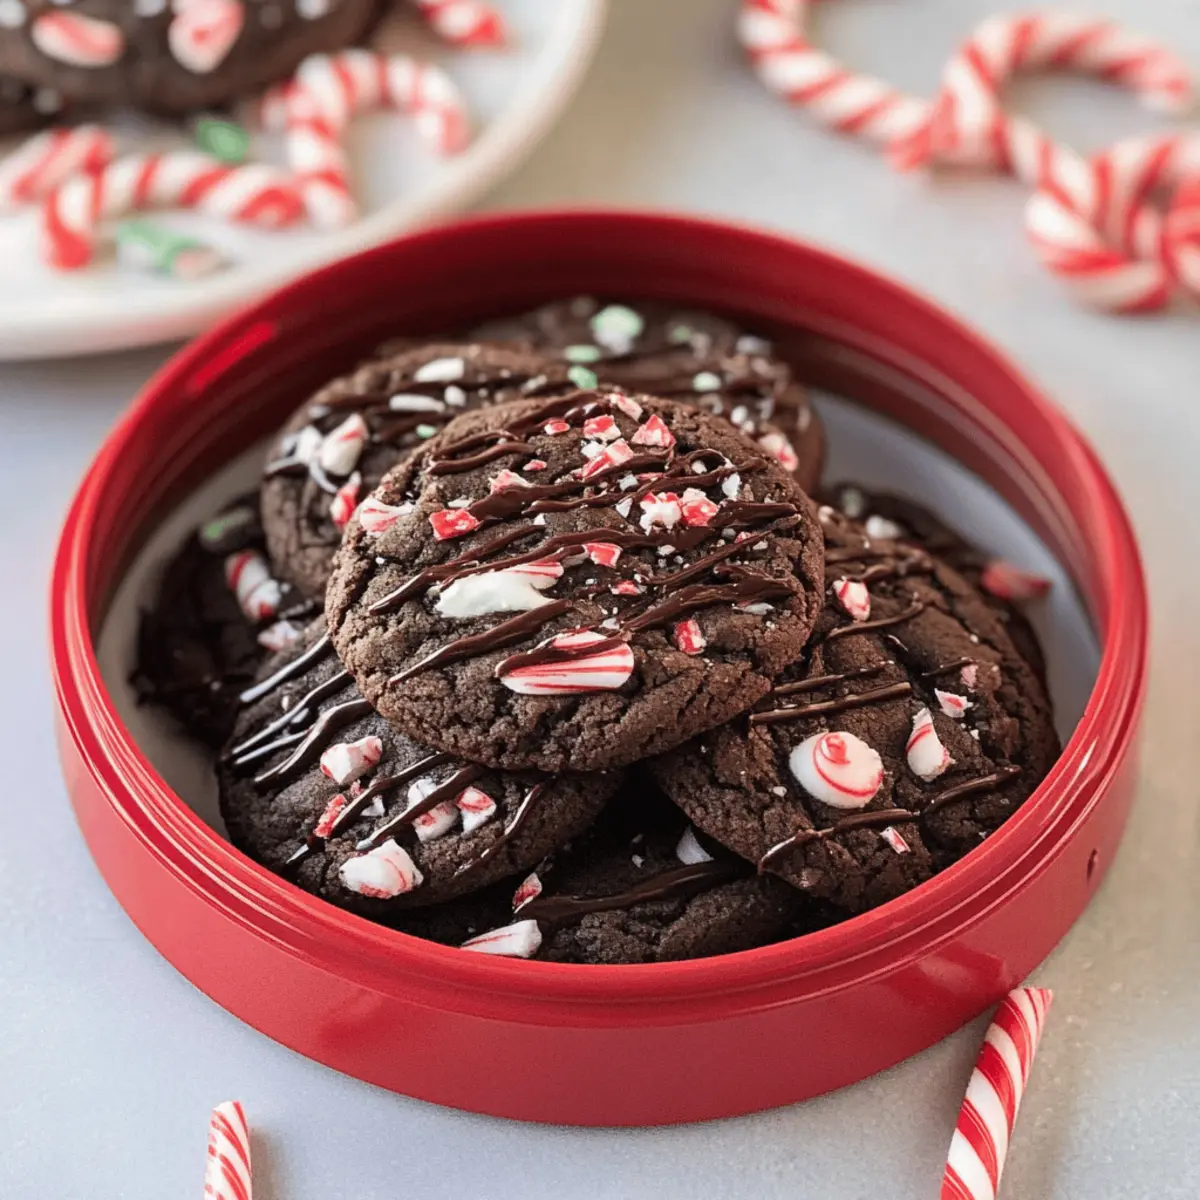
The aroma wafting through the house as these cookies bake is enough to transport me back to my childhood holiday gatherings, where laughter mingled with the sweet scent of peppermint and chocolate. My recipe for Gluten-Free Chocolate Peppermint Cookies captures that essence in every bite, making them an irresistible addition to your festive celebrations. These cookies boast a soft, brownie-like texture that will have everyone asking for seconds. Plus, they’re incredibly easy to whip up, ensuring you’re not stuck in the kitchen for hours while still delivering a delightful treat. So, whether you’re gearing up for a cookie swap or just indulging on a cozy evening, these cookies are sure to hit the sweet spot. What’s your favorite way to enjoy holiday cookies?

Why Are These Cookies So Special?
Irresistible Flavor: The perfect blend of rich chocolate and refreshing peppermint creates a festive flavor that’s hard to resist.
Gluten-Free Delight: These cookies cater to gluten-sensitive friends and family, ensuring everyone can enjoy a sweet treat.
Easy to Make: With simple steps and common ingredients, they are an effortless addition to your holiday baking repertoire.
Versatile Variations: Experiment with different chocolate chips or sugar substitutes, like coconut sugar, to customize these cookies according to your taste.
Crowd-Pleasing Treat: Serve them warm with milk or hot chocolate for a delightful experience that will have your guests clamoring for more!
The enticing aroma of baking cookies fills the air, making them a festive favorite for any gathering!
Chocolate Peppermint Cookie Ingredients
For the Cookie Dough
• Gluten-Free All-Purpose Flour – Provides structure and texture to the cookies, perfect for those needing a gluten-free option.
• Cocoa Powder – Adds deep chocolate flavor; make sure it’s sifted to avoid clumps.
• Baking Soda – Helps the cookies rise, ensuring they remain soft and chewy.
• Salt – Enhances the overall flavor of the cookies.
• Butter (softened) – Contributes to richness and softness; substitute with coconut oil for a dairy-free version.
• Brown Sugar – Adds moisture and a lovely caramel-like flavor; coconut sugar can be used for a lower glycemic option but sweetness will be reduced.
• White Sugar – Balances sweetness in the cookies; coconut sugar is a suitable substitute yet may lessen the sweetness.
• Egg – Binds the ingredients together for a cohesive dough.
• Peppermint Extract – Provides the essential minty flavor; always check the expiration date to ensure maximum freshness.
• Vanilla Extract – Complements the chocolate and mint flavors beautifully.
For the Chocolate Chips
• Chocolate Chips (white, milk, dark, mint) – Adds delicious chocolatey chunks throughout; mint chocolate chips enhance the peppermint flavor further!
• Extra Chocolate Chips (for drizzling) – Adds a decorative chocolate drizzle on top, making them extra special.
For Decoration
• Mini Candy Canes (crushed) – Offers festive decoration and an extra kick of peppermint flavor; alternatively, sprinkles can be a fun decoration too.
These delightful Chocolate Peppermint Cookies are set to become a cherished holiday favorite!
Step‑by‑Step Instructions for Chocolate Peppermint Cookies
Step 1: Preheat the Oven
Begin by preheating your oven to 350°F (175°C). While the oven warms up, line two baking sheets with parchment paper, ensuring a non-stick surface for your cookies. This preparation sets the stage for baking delicious Chocolate Peppermint Cookies, ensuring they don’t stick and come out perfectly shaped.
Step 2: Mix Dry Ingredients
In a medium-sized bowl, whisk together 1 cup of gluten-free all-purpose flour, 1/3 cup of cocoa powder, 1/2 teaspoon of baking soda, and a pinch of salt. Make sure to sift the cocoa powder to avoid clumps for a smoother dough. This combination will provide the rich chocolate flavor and proper texture for your delightful cookies.
Step 3: Cream the Wet Ingredients
In a large mixing bowl, cream together 1/2 cup of softened butter, 1/2 cup of brown sugar, and 1/4 cup of white sugar until the mixture is light and fluffy, about 2-3 minutes. Then, add in one large egg, 1 teaspoon of peppermint extract, and 1 teaspoon of vanilla extract. Mix well until everything is fully combined, creating a rich and flavorful base for your Chocolate Peppermint Cookies.
Step 4: Combine Ingredients
Gradually add the dry ingredient mixture to the wet mixture, stirring gently until a smooth dough forms. The dough will be thick, luscious, and chocolatey. Ensure all dry ingredients are fully integrated to achieve the perfect texture. If desired, you can use a spatula for this step, which helps combine everything evenly without overworking the dough.
Step 5: Fold in Chocolate Chips
Gently fold in 1 cup of chocolate chips of your choice, whether white, dark, or peppermint variety, until they are evenly distributed throughout the dough. This ensures that every bite of your Chocolate Peppermint Cookies is filled with delicious chocolatey goodness. Their beautiful chunks will create a delightful contrast against the chocolate cookie base.
Step 6: Scoop and Shape Cookies
Using a small cookie scoop, drop rounded tablespoons of dough onto the prepared baking sheets, spacing them about 2 inches apart. The dough will spread slightly as it bakes, so give each cookie enough room to grow. You’ll find yourself excited at the thought of these tempting cookies baking in the oven!
Step 7: Bake the Cookies
Place the baking sheets in the preheated oven and bake for 8-10 minutes. Keep a close eye on them, as the edges should be set while the centers remain soft and slightly underbaked. This will ensure your Chocolate Peppermint Cookies are chewy and delightful, reminiscent of brownies in texture.
Step 8: Cool and Decorate
After baking, remove the cookies from the oven and allow them to cool on the baking sheets for 5 minutes before transferring them to a wire rack. Once cool, drizzle melted chocolate and sprinkle crushed mini candy canes or festive sprinkles on top for a delightful finishing touch. Each cookie will shine with festive cheer!

Make Ahead Options
These Gluten-Free Chocolate Peppermint Cookies are perfect for meal prep enthusiasts! You can prepare the cookie dough up to 24 hours in advance by shaping it into balls and refrigerating them until you’re ready to bake. This keeps the dough fresh and allows the flavors to meld beautifully, ensuring just as delightful results. For even quicker options, you can also freeze the dough balls for up to 3 months. When you’re ready to enjoy these cookies, simply bake them straight from the fridge or freezer, adding a minute or two to the baking time for frozen dough. With these make-ahead tips, you’ll have tasty treats ready in a flash, making holiday baking a breeze!
Tips for the Best Chocolate Peppermint Cookies
-
Butter Temperature: Use softened butter, not melted. Room temperature butter blends better for a smooth, rich cookie dough.
-
Sift Cocoa Powder: Always sift your cocoa powder before mixing to prevent clumps, which can affect the texture of your Chocolate Peppermint Cookies.
-
Chill Dough if Needed: If your cookie dough feels too soft, refrigerate it for about 30 minutes. This helps maintain the cookie shape while baking.
-
Check Baking Time: Keep a close eye on baking cookies; they should be soft in the center when you take them out. Overbaking can lead to a dry cookie texture.
-
Mixing Variations: Feel free to experiment with chocolate chips! Using a combination of dark and white chips adds a delightful contrast and flavor depth.
-
Storage for Freshness: Store cookies in an airtight container at room temperature for optimal freshness, best enjoyed within 3-4 days.
What to Serve with Soft Gluten-Free Chocolate Peppermint Cookies
Get ready to create a magical holiday spread that enhances every delightful bite of your cookies.
-
Creamy Hot Chocolate: The rich, velvety warmth of hot chocolate pairs beautifully with the minty cookies, making for a satisfying treat on a chilly night.
-
Peppermint Bark: This crunchy, chocolatey delight amplifies the peppermint flavor and adds a festive touch that complements your cookies’ festive vibe.
-
Vanilla Ice Cream: The creamy sweetness of vanilla ice cream balances the rich chocolate and mint, creating a harmonious dessert experience.
-
Fresh Fruit Medley: Juicy strawberries and tart raspberries provide a refreshing contrast, offering a vibrant taste palette alongside the cookies.
-
Coffee or Espresso: A robust cup of coffee enhances the chocolate flavor, while the warm caffeine brings out the mint’s brightness for a cozy pairing.
-
Holiday Fruit Punch: A fruity, spiced punch adds a festive flair and a refreshing twist that balances the cookie’s sweetness.
Imagine setting our Soft Gluten-Free Chocolate Peppermint Cookies among these delightful treats, ensuring your holiday gathering is unforgettable!
How to Store and Freeze Chocolate Peppermint Cookies
Room Temperature: Store cookies in an airtight container at room temperature for optimal freshness, best enjoyed within 3-4 days.
Fridge: If you prefer them chilled, place cookies in a sealed container in the fridge for up to a week. Just allow them to come to room temperature before serving!
Freezer: For longer storage, freeze cookies in a single layer on a baking sheet, then transfer to airtight bags or containers for up to 2 months. Thaw at room temperature before enjoying.
Reheating: If you’d like a warm cookie, reheat in the microwave for about 10-15 seconds, or enjoy them straight from the freezer for a delightful treat!
Chocolate Peppermint Cookies Variations
Feel free to explore these variations and make these delightful cookies uniquely yours!
-
Sugar-Free: Use sugar substitutes like erythritol or monk fruit to create a no-sugar-added version. You’ll still enjoy the same festive flavors without the extra calories.
-
Dairy-Free: Substitute softened butter with coconut oil or dairy-free margarine to keep it plant-based. This will also give your cookies a slightly different yet delicious taste.
-
Nutty Twist: Add chopped nuts like walnuts or pecans to the dough for added crunch and flavor. The nutty texture complements the rich chocolate and refreshing peppermint beautifully.
-
Chocolate Overload: For chocolate lovers, mix in chocolate-covered peppermint candies before baking or sprinkle mini chocolate chips on top. This adds an exciting texture and extra chocolaty goodness!
-
Minty Freshness: Boost the mint flavor by adding crushed peppermint candies into the dough. This tiny twist brings an extra burst of peppermint in every bite, perfect for the holidays.
-
Cocoa Nibs: Enhance the chocolate flavor profile by folding in cocoa nibs for a tiny crunch and more intense cocoa experience. They have a slight bitterness that balances the cookie’s sweetness perfectly.
-
Fruity Flavor: Add a handful of dried cherries or cranberries for a fruity twist. The tartness from dried fruits adds a lovely contrast to the sweetness of the cookies.
-
For Different Textures: Shorten the baking time slightly to achieve a softer and chewier cookie, or extend it by a minute for a crispier edge but still gooey center.
No matter how you choose to customize, you can create a memorable cookie experience for every festive gathering. Looking for more cookie ideas? Check out my recipes for Cinnamon Roll Cookies and Pumpkin Cookies Soft. Happy baking!

Chocolate Peppermint Cookies Recipe FAQs
How do I choose the best gluten-free flour for the cookies?
Absolutely! When selecting gluten-free all-purpose flour, look for a blend that includes xanthan gum for better texture. Brands like Bob’s Red Mill or King Arthur offer great options. Make sure it’s fresh, as stale flour can affect the final result.
How should I store leftover cookies?
To keep your Chocolate Peppermint Cookies fresh, store them in an airtight container at room temperature for up to 3-4 days. If you notice any moisture in the container, consider placing a piece of bread inside to help absorb it!
Can I freeze these cookies for later?
Very! To freeze your cookies, allow them to cool completely first. Arrange them in a single layer on a baking sheet and place in the freezer for about 1-2 hours. Once frozen, transfer them to an airtight container or freezer bag, where they can last up to 2 months. Thaw at room temperature before enjoying!
What can I do if my cookies spread too much while baking?
If your cookies spread too much in the oven, it might be due to soft butter or over-mixing the dough. To troubleshoot, make sure your butter is just softened—not melted—and consider chilling the dough in the fridge for about 30 minutes before baking. This helps the cookies maintain their shape.
Are these cookies safe for pets, especially dogs?
No, it’s best to keep these cookies away from pets. The chocolate and peppermint extracts can be harmful to dogs, so make sure to enjoy them yourself or share with fellow humans instead!
Can I substitute the egg in this recipe?
While an egg is essential for binding, if you’re looking for an alternative, you can try using a flaxseed meal egg. To create one, mix 1 tablespoon of ground flaxseed with 2.5 tablespoons of water. Let it sit for about 5 minutes until it thickens, and then incorporate it into your cookie dough as you would with a regular egg. However, keep in mind this might slightly change the texture and flavor!

Irresistible Chocolate Peppermint Cookies for a Festive Treat
Ingredients
Equipment
Method
- Preheat your oven to 350°F (175°C) and line two baking sheets with parchment paper.
- In a medium bowl, whisk together the flour, cocoa powder, baking soda, and salt.
- In a large mixing bowl, cream the softened butter, brown sugar, and white sugar until light and fluffy. Add egg, peppermint extract, and vanilla extract.
- Gradually add the dry ingredients to the wet ingredients, stirring until a smooth dough forms.
- Fold in chocolate chips until evenly distributed.
- Scoop rounded tablespoons of dough onto prepared baking sheets, spacing 2 inches apart.
- Bake in preheated oven for 8-10 minutes, until edges are set and centers remain soft.
- Allow cookies to cool on baking sheets for 5 minutes before transferring to wire racks. Drizzle with chocolate and sprinkle with crushed candy canes.

Leave a Reply