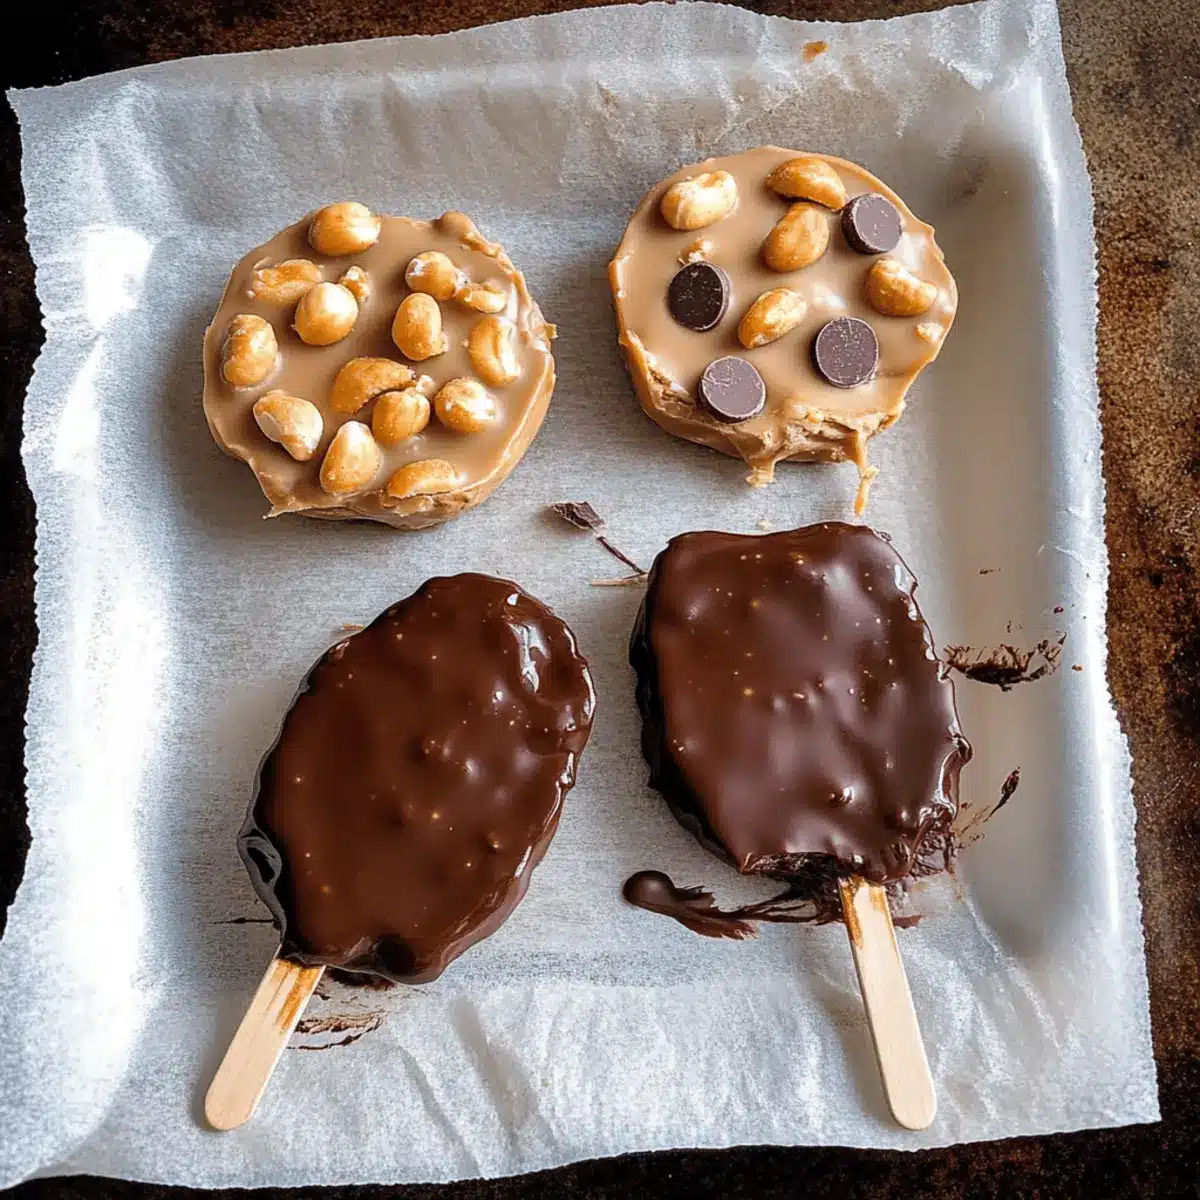
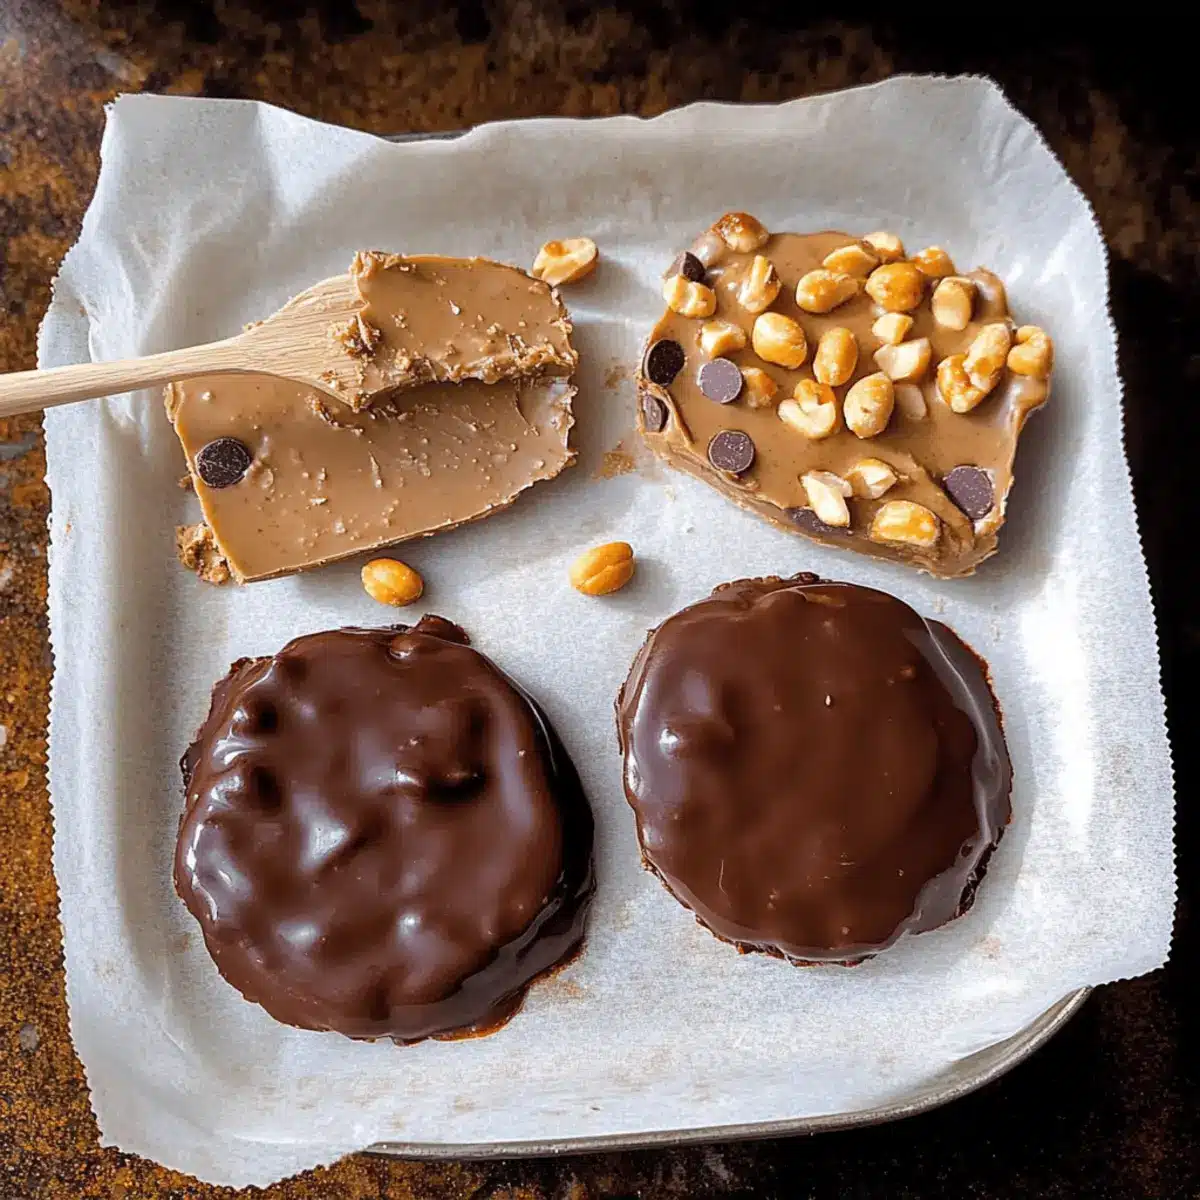
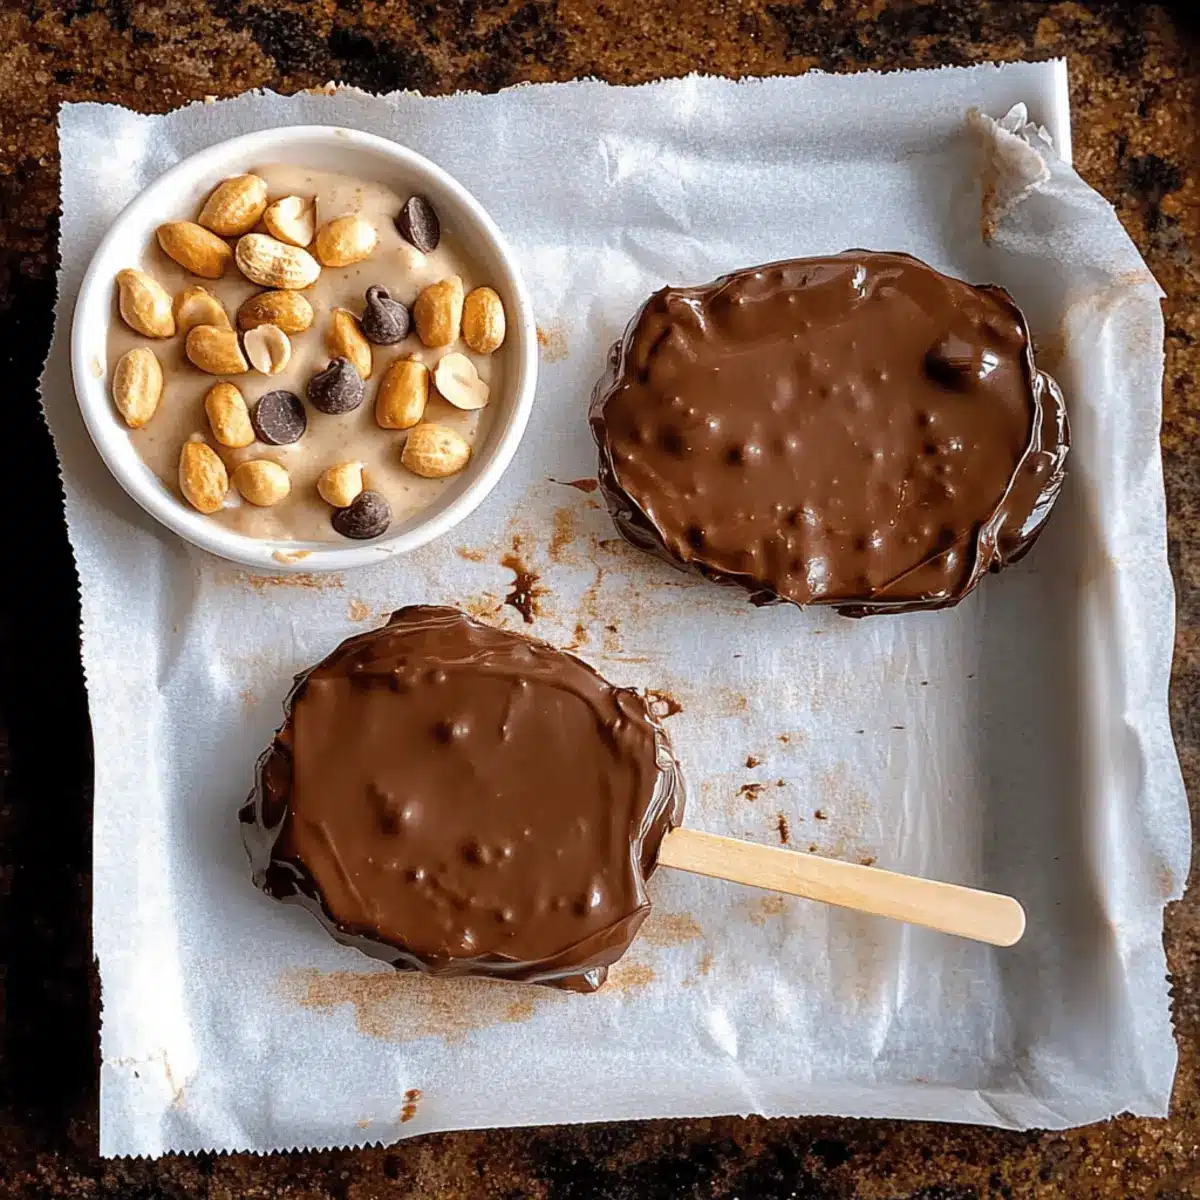
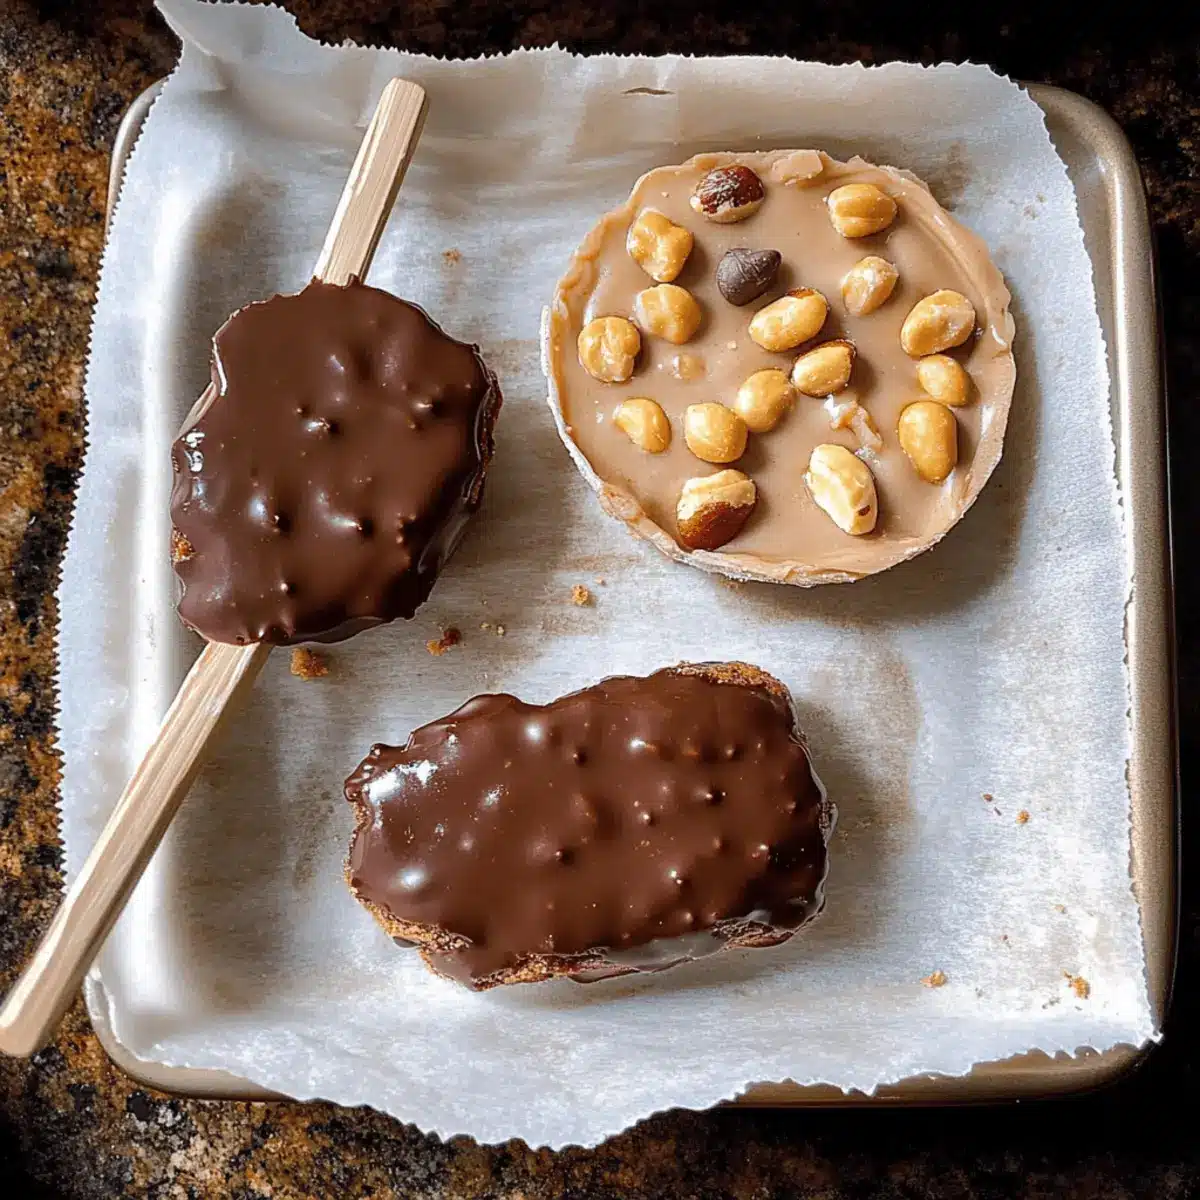
As I rummaged through my pantry, a delightful vision of creamy chocolate and nutty peanut butter danced in my mind—enter the 3-Ingredient Healthy Buster Bars! This joyful treat is truly a culinary gift, capturing the essence of the beloved Dairy Queen dessert, without the guilt. Packed with over 15 grams of protein, these no-bake bars are perfect for anyone seeking a quick snack or a fun dessert that won’t derail their healthy habits. And the best part? They come together in under 10 minutes, requiring just three simple ingredients! Whether you’re a seasoned home chef or just someone tired of fast food, these bars are a heavenly solution to satisfy your cravings. So, what creative twists will you put on your own batch of Buster Bars?

Why are Buster Bars a must-try?
Delightfully Simple: With just three ingredients, you’ll whip up these treats in under 10 minutes—perfect for both busy weeknights and unexpected guests.
Protein-Packed: Each bar offers over 15 grams of protein, making it a deliciously healthy choice for your post-workout recovery or midday snack.
Customizable Joy: Switch up the yogurt flavors or nut butters to create your own unique version. Try adding a sprinkle of chopped peanuts for extra crunch!
No-Bake Convenience: No baking means no hassle! Just mix, freeze, and enjoy these delightful bars at your convenience.
Crowd-Pleasing Appeal: Whether you’re sharing with kids, friends, or enjoying solo, these Buster Bars are sure to bring smiles, making them a hit for everyone.
For more inspired treats, check out my Maple Donut Bars or indulge in the flavors of Butter Cheerio Bars!
Buster Bars Ingredients
• Transform your dessert game with these delicious Buster Bars!
For the Base
- Yogurt – Provides creaminess and acts as the base. Substitute with vanilla ice cream or vegan yogurt for a non-dairy option.
- Peanut Butter – Adds flavor and richness. Can be replaced with almond butter, cashew butter, sunflower seed butter, or a nut-free alternative.
For the Coating
- Chocolate Chips – Create the chocolate coating. Use dairy-free chocolate chips for a vegan version, or opt for sugar-free ones if making keto-friendly bars.
- Coconut Oil – Optional, used to achieve a smoother chocolate coating. Can be omitted for a thicker chocolate.
For Sweetness
- Sweetener – Adds sweetness to the mixture. Choose maple syrup, honey, or a sugar substitute based on dietary preferences.
Optional Crunch
- Peanuts – Optional ingredient for a crunchy texture. Chop finely before sprinkling on top.
With these simple ingredients, your Buster Bars will become the highlight of your snack repertoire!
Step‑by‑Step Instructions for Buster Bars
Step 1: Combine Ingredients
In a medium mixing bowl, combine your yogurt, peanut butter, and sweetener if using. Whip these simple ingredients together vigorously for about 2 to 3 minutes until the mixture is completely smooth and creamy. This step is crucial for achieving the delightful, fudgy texture of your Buster Bars.
Step 2: Add Chocolate Chips
Gently fold in a handful of mini chocolate chips into the yogurt mixture. This will enhance the chocolate flavor in your Buster Bars while providing delightful little bursts of sweetness. Make sure to mix just until the chocolate chips are evenly distributed through the creamy base without over-mixing.
Step 3: Shape the Bars
Spoon dollops of the mixture onto a parchment-lined tray, about 2 to 3 inches apart. Using a popsicle stick or the back of a spoon, gently press into each dollop to create a bar shape, making them easy to hold later. This process should take about 5 minutes and will ensure each Buster Bar is perfectly formed.
Step 4: Add Crunch (Optional)
If you’d like a crunchy texture in your Buster Bars, finely chop some peanuts and sprinkle them generously on top of each bar. Press them in lightly to ensure they stick. This optional step adds an extra element of delight, making your bars even more enjoyable.
Step 5: Freeze Until Firm
Place the tray of shaped bars into the freezer for about 1 to 2 hours, or until they are completely firm. This freezing step is essential to create a sturdy base that will hold up when coated with chocolate. You’ll know they’re ready when they feel solid to the touch.
Step 6: Melt Chocolate for Coating
While the bars are freezing, melt your chocolate chips in a microwave or using a double boiler method. If desired, mix in a little coconut oil while melting to achieve a silky smooth chocolate consistency. Aim for about 30 seconds to 1 minute in the microwave, stirring every 15 seconds until fully melted.
Step 7: Dip the Bars
Once the Buster Bars are firmly frozen, carefully dip each bar into the melted chocolate, ensuring they are well-coated. Shake off any excess chocolate before placing each one back onto the parchment paper. This step helps create a delicious, hard chocolate shell around your creamy bars.
Step 8: Set the Chocolate Coating
Return the tray of chocolate-coated Buster Bars to the freezer for an additional 30 minutes to 1 hour to allow the chocolate shell to fully set. Make sure the bars are frozen until the chocolate appears glossy and hard. Once done, they’re ready to be devoured!

Buster Bars Variations & Substitutions
Feel free to explore these delightful twists that will elevate your Buster Bars to another level of deliciousness!
-
Dairy-Free: Substitute yogurt with coconut yogurt or a non-dairy option for a vegan treat. This swap keeps the creamy goodness while staying plant-based.
-
Nut-Free: Try sunflower seed butter instead of peanut butter to make your bars safe for schools or nut allergies. The flavor remains rich and satisfying!
-
Flavor Infusion: Add a tablespoon of cocoa powder to the yogurt mixture for a chocolatey adventure. This extra step enhances the chocolate experience in every bite.
-
Sweetness Twist: Experiment with flavored sweeteners like agave nectar or date syrup for a unique sweetness profile. The flavor variations can turn your treats into something extraordinary!
-
Crunchy Goodness: Sprinkle in some granola or crushed pretzels for an unexpected crunch. This twist not only elevates the texture but also adds exciting flavors to each bar.
-
Fruit-Filled: Incorporate fresh or dried fruits, such as diced strawberries or cranberries, right into the yogurt mixture. Fruit adds both nutrients and a delightful burst of flavor.
-
Chocolatey Delight: Drizzle melted white chocolate over the hardened bars for an eye-catching presentation and a touch of sweetness. It’s a simple enhancement that impresses!
Looking for more tasty treats? Check out these scrumptious Maple Donut Bars or satisfy your sweet tooth with Turtle Bars Sweet. Enjoy customizing your Buster Bars to your heart’s content!
Storage Tips for Buster Bars
Fridge: Store Buster Bars in an airtight container in the fridge for up to 3 days if you’re planning to enjoy them soon.
Freezer: For longer freshness, keep the bars in the freezer for up to one month. This will help preserve their creamy texture and delicious flavor.
Wrapping: Wrap each bar individually in parchment paper or plastic wrap before freezing to prevent sticking and ensure easy serving.
Reheating: If you like your bars a bit softer, let them sit at room temperature for about 10 minutes before enjoying.
Expert Tips for Buster Bars
-
Smooth Mixture: Make sure to whip the yogurt and peanut butter together until entirely smooth. This ensures a creamy and enjoyable texture in your Buster Bars.
-
Chocolate Coating: If you find the chocolate coating too thick, adding a bit of coconut oil during melting can help achieve a smoother dip, making it easier to coat the bars evenly.
-
Proper Freezing: Ensure the bars are fully frozen before dipping in chocolate. If they’re not completely solid, they may melt instead of staying firm during coating.
-
Experiment with Flavors: Feel free to switch up the yogurt or nut butter for a fun variation. A hint of cocoa powder in the peanut butter mixture can also add a delightful chocolate depth to your Buster Bars.
-
Storage Tips: Make sure to keep leftover bars in an airtight container in the freezer to maintain their freshness and texture for up to one month. Enjoy them anytime cravings hit!
Make Ahead Options
These Buster Bars are fantastic for meal prep! To save time during busy weeknights, you can prepare the base mixture (yogurt and peanut butter) up to 24 hours in advance and store it in the refrigerator. Simply place it in an airtight container while making sure to cover it well to maintain its creamy texture. You can also scoop the mixture onto the parchment-lined tray and freeze them for up to 3 days before dipping in chocolate. When you’re ready to finish the process, just melt your chocolate, dip the bars, and return them to the freezer to set. With these make-ahead tips, you’ll enjoy delicious Buster Bars with minimal effort!
What to Serve with 3-Ingredient Healthy Buster Bars
Elevate your snack time by pairing these delightful bars with complementary flavors and textures that enhance their creamy, indulgent nature.
-
Fresh Berries: The tartness of strawberries, blueberries, or raspberries adds a refreshing contrast to the rich bars, making each bite enjoyable.
-
Creamy Greek Yogurt: Serve the bars with a dollop of Greek yogurt. This adds extra protein and creaminess, creating a satisfying snack that’s wholesome and delicious.
-
Chopped Nuts: Sprinkle some chopped walnuts or almonds on the side for added crunch. Nuts bring a nice textural contrast and nutty flavor to balance the sweetness of the bars.
-
Smoothies: Pair with a fruity smoothie. The vibrant flavors of banana and spinach will create a cheerful, nutrient-packed breakfast or post-workout treat.
-
Coconut Flakes: Sprinkle toasted coconut flakes over the bars or serve alongside them for a tropical twist that complements the chocolate and peanut butter.
-
Iced Coffee: Enjoy with a chilled iced coffee or mocha. The rich coffee flavor highlights the chocolate while offering a refreshing kick for energy.
-
Dark Chocolate Dipping Sauce: For a decadent addition, drizzle some warm dark chocolate over the bars. This enhances the chocolate experience and takes it to a truly indulgent level.
Let your imagination run wild as you choose from these delightful combinations!

Buster Bars Recipe FAQs
How do I know if my yogurt is ripe?
Absolutely! To ensure your yogurt is at its best, look for a creamy texture without excess liquid on top. If it has a sour smell or is past its expiration date, it’s time to toss it! Fresh yogurt will not only taste better but will also whip up into a delightful creamy base for your Buster Bars.
What’s the best way to store leftover Buster Bars?
Very! Pack your Buster Bars in an airtight container in the freezer to maintain their freshness for up to one month. For convenience, consider wrapping each bar individually in parchment paper or plastic wrap to avoid sticking together. If you prefer them softer, leave them in the fridge for up to 3 days, just make sure to consume them quickly!
Can I freeze my Buster Bars?
Absolutely! To freeze your Buster Bars, follow these steps: once they are shaped and frozen until firm, you can dip them in the melted chocolate. After coating, place them back on the parchment paper and freeze again until the chocolate is set. They can freeze for up to one month, maintaining their chewy, creamy texture beautifully!
What if my chocolate coating turns out too thick?
If you find that your chocolate coating is a bit thick, don’t worry! Simply mix in a teaspoon or two of coconut oil while melting. This will help to thin the chocolate out, making it surprisingly smooth and easier to coat your Buster Bars evenly, resulting in a delicious, glossy finish.
Are there any allergies I should be aware of with this recipe?
Very! This recipe is versatile, but it’s important to consider potential allergies. The base contains yogurt and peanut butter, which are common allergens. You can easily substitute with nut-free alternatives and non-dairy yogurt to create a vegan and gluten-free treat. Always double-check labels for added preservatives or allergens if you’re preparing these for anyone with specific dietary restrictions.

Easy Buster Bars – Guilt-Free Chocolate Peanut Butter Bliss
Ingredients
Equipment
Method
- In a medium mixing bowl, combine yogurt, peanut butter, and sweetener if using. Whip until smooth and creamy.
- Gently fold in chocolate chips until evenly distributed.
- Spoon mixture onto a parchment-lined tray and press into bar shapes.
- Sprinkle finely chopped peanuts on top if desired.
- Freeze for 1-2 hours until firm.
- Melt chocolate chips in the microwave or double boiler, adding coconut oil if desired.
- Dip each frozen bar into melted chocolate, shake off excess, and place back on parchment.
- Return bars to the freezer for 30 minutes to 1 hour to set the chocolate coating.

Leave a Reply